PowerShell: Getting Started - Jobs
•6 min read•Ginja


Welcome to my Getting Started with Windows PowerShell series!
In case you missed the earlier posts, you can check them out here:
- Customizing your environment
- Command discovery
- Using the ISE and basic function creation
- A deeper dive into functions
- Loops
- Modules
- Help
- Accepting pipeline input
- Strings
We will be exploring:
Jobs in PowerShell allow you to run commands in the background. You use a command to start the job, and then various other commands to check in and receive information from it. Jobs can be started as 64-bit or 32-bit, regardless of what you launch your session as. You can also start jobs that run as a different user.
PowerShell jobs are handy for a lot of different uses. One could be running a script that contains multiple jobs that will perform different Active Directory tasks. You can run those in parallel, and use a While loop to check in on the jobs as they execute.
In this post you'll see how to start jobs, see running jobs, and get information as jobs complete.
The command to start a job in PowerShell is Start-Job.
Let's use this command to start a job that will wait for one minute, and then execute the command Get-Process.

The output of the job started is displayed after we execute the Start-Job command.
If you wanted to wait for this job to complete (which would make the console unusable until the job completes), you can use the Wait-Job command. With Wait-Job you'll need to specify the Job Name, Id, or simply pipe the Start-Job command to Wait-Job.
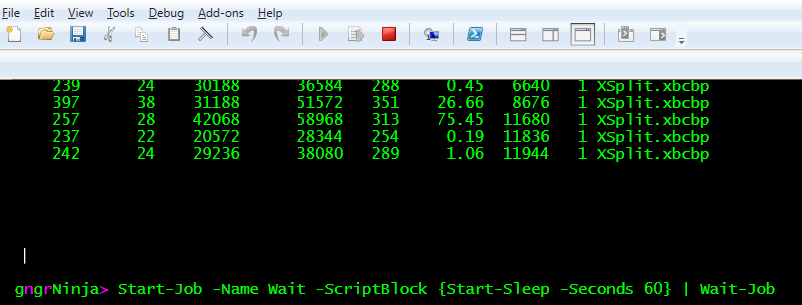
And now we wait for the console to free up after 60 seconds have passed.
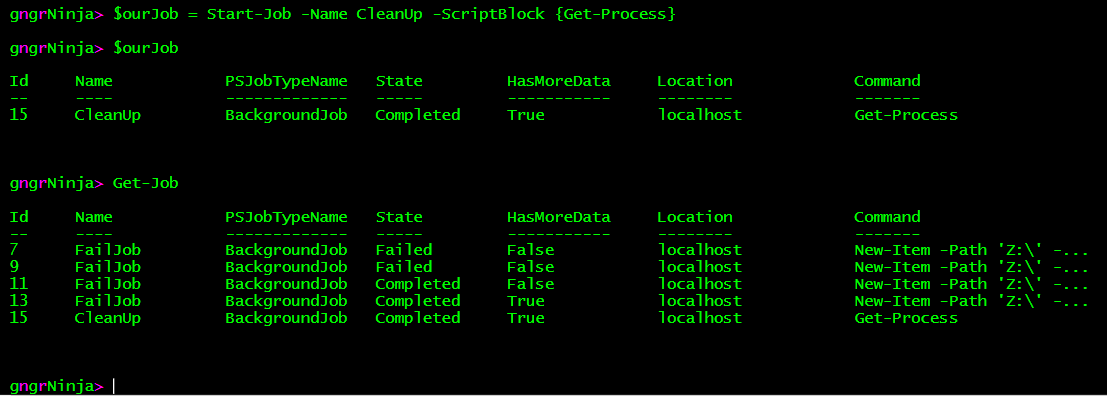
To keep an eye on the running jobs in PowerShell, we'll use the command Get-Job.

Get-Job will show us all running jobs by default. We can also narrow it down to just our job via the Job Name or Job Id. Let's try getting this Job via the Job Id.

If there were more Jobs running, we'd still only see this Job as we specified that we only want to see the Job with the Id value of 1.
There are few different ways to collect information from running jobs in PowerShell. The official command to do it is Receive-Job. You'll need to specify the Job Name or Id when you use this command. Let's receive the information from this job, and specify the -Keep parameter so we can receive the information again later.
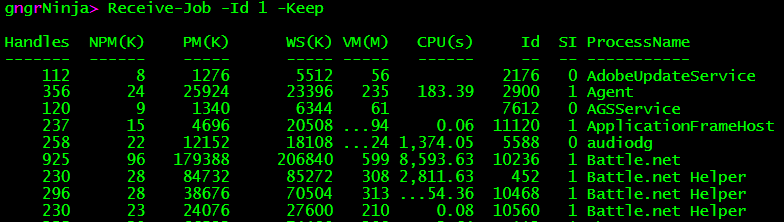
You can see it displayed the output of Get-Process. Let's store the job in an object, and look at another way to receive the information.
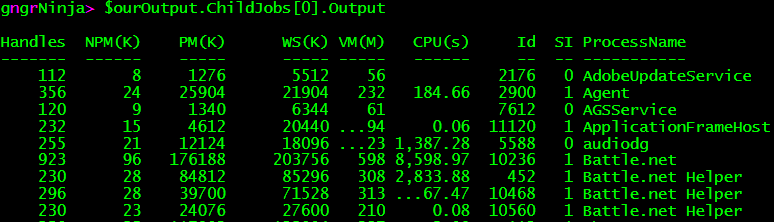
This is a bit interesting. PowerShell stores most of the job information in a child job for each job you run. To access this information, you must access the ChildJobs property for the first child job, or 0. Let's take a look.
Here we started a job, and stored the object in the $ourOutput variable.
Now we can use that variable to take a look at the results.

Let's see the available methods and properties for $ourOutput.
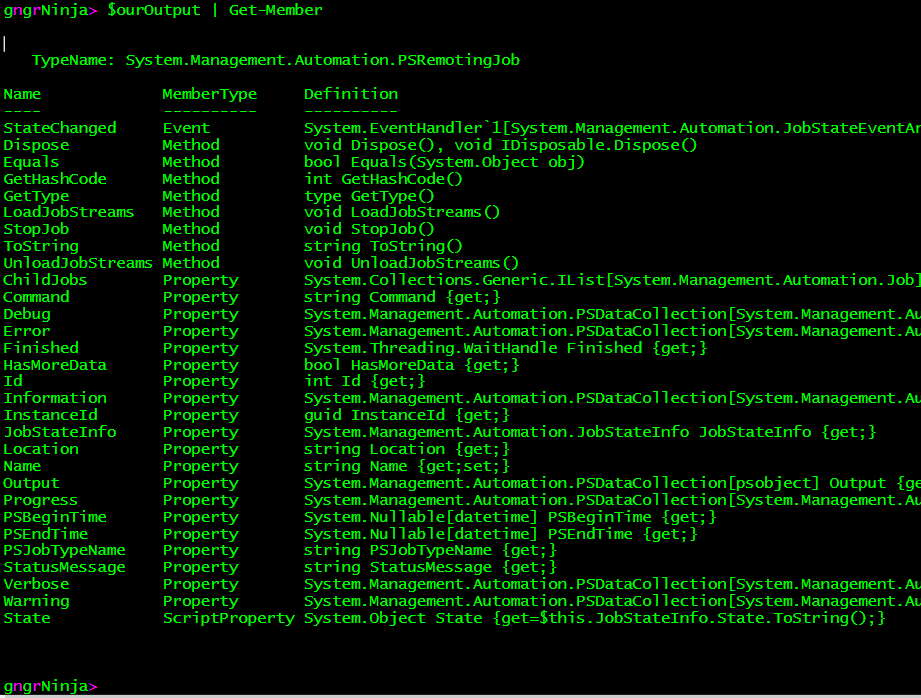
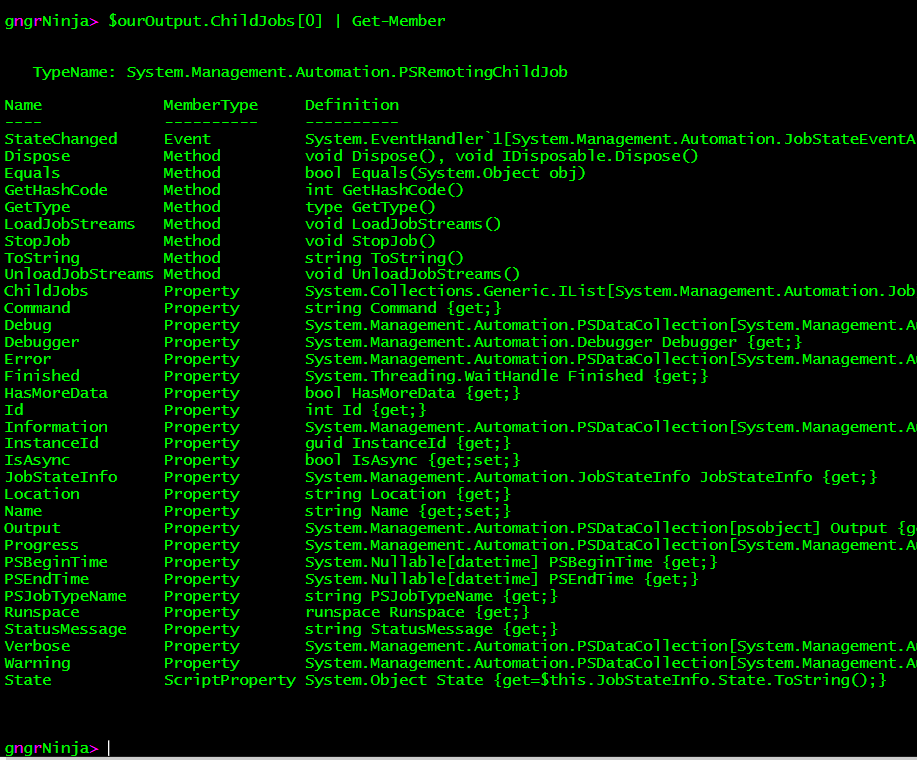
Hey, there's the ChildJobs property! Let's take a look at it's properties and methods as well.
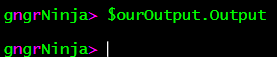
Both $ourOutput and $ourOutput.ChildJobs[0] have the Output property. However, since our job is actually spawned as child job, this property will be empty on the initial object, and have a value only on the child object.
Error handling in jobs can be tricky, as sometimes a job state will show as completed, but the output of the job is actually a failed command. There are other times where a job will state that is actually has failed. In each case, there are two main spots to check for error information when a job fails.
Let's take a look at the two examples. I can replicate different states with the New-Item command and toggling the -ErrorAction parameter to Stop.
Job State Failed
Let's look at the $failJob object to make sure it has indeed failed...

Alright... now here is the weird part. Normally you'd look at the ChildJob's Error property to get the error message. That... or Receive-Job would show you an error. I have tried all of those approaches. It looks like Receive-Job will display the error, but you're unable to store it in a variable or parse the message in any way. Not helpful!
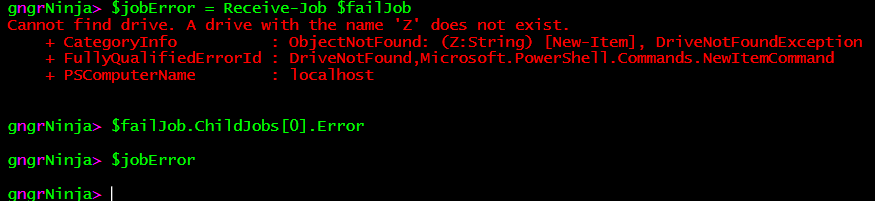
So how do we see what happened? We need to look at the property $failJob.ChildJobs[0].JobStateInfo.Reason.Message to get the message of what happened (as a string).

There we go, got the error!
Job State Completed
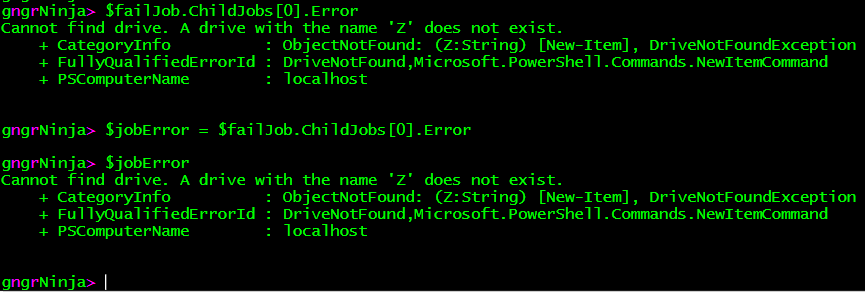
There are times when the job will complete, and the error message will indeed be in the ChildJob's Error property. Let's take the -ErrorAction Stop off the New-Item command and start the job again.
Now let's verify it shows as completed.

This job has essentially the same error message as the other error example above. The difference is the error is stored in the ChildJob property of Error. This is one of the most confusing aspects of PowerShell jobs. Receive-Job will display the error, but also like above not let you store it. Not good for automation!
Here's how we get the error information this time.
Now that we've gone over how to create jobs, receive their information, and perform some error handling... let's move on to cleanup.
The Remove-Job command will remove jobs from PowerShell. You can see this from start to finish with this example.
You can see the CleanUp job name amidst all of the other jobs I still have from this post.
To remove this job only, you can use Remove-Job with the Job Name or Id. We can also pipe the variable we stored our job object in ($ourJob) to Remove-Job.
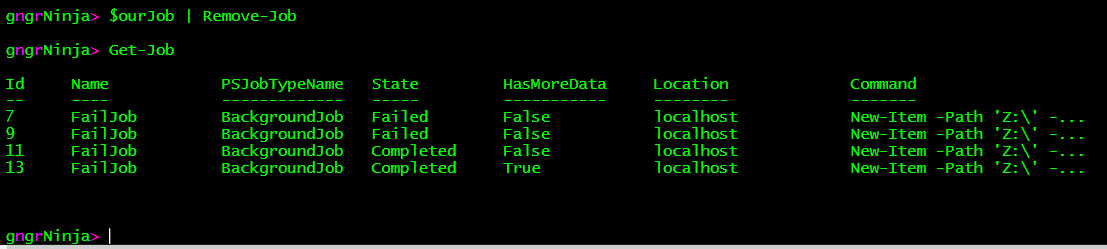
And it's gone! What if we wanted to remove all of these jobs? You can actually pipe Get-Job to Remove-Job.
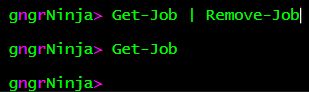
As you can see, all of the jobs are now cleaned up.
The glory of PowerShell Jobs is being able to run multiple commands at the same time. This example code will start up multiple jobs, and then use a While loop to monitor them. As they complete, the output and/or error messages will be output to a text file with the job name and date stamp as the file name. The output folder is C:\PowerShell\part10\output.
Copy and paste the code in the ISE, and ensure you can write to C:\PowerShell\Part10. If you can't, you may see some nasty error messages, as I have not added any error handling to this example. Save the script as C:\PowerShell\Part10\part10.ps1.
Code
Here's the code in action...
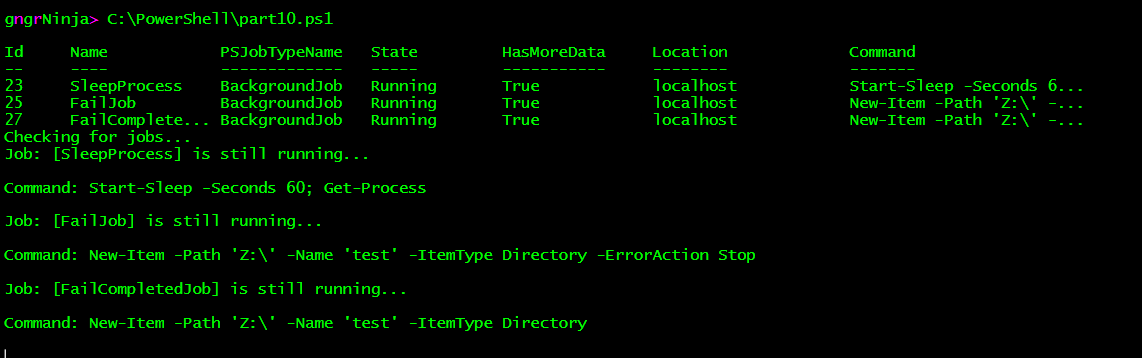
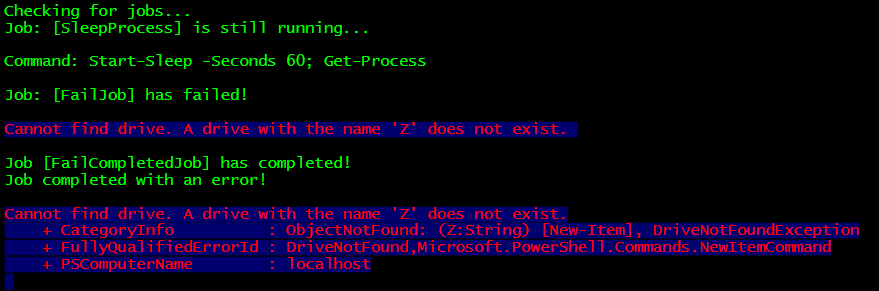

So there's the output to the console. Let's check out the C:\PowerShell\Part10\Output folder.

That looks good. Let's take a peek at each file's contents.
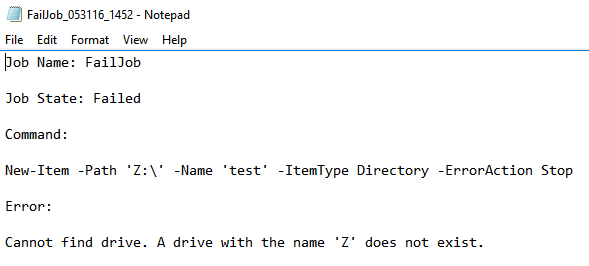
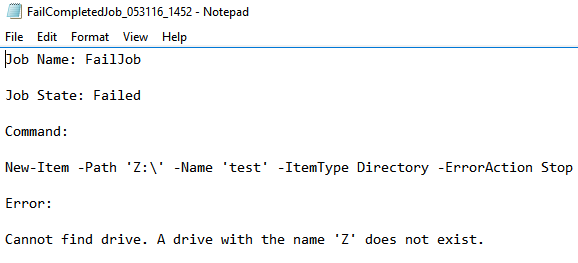
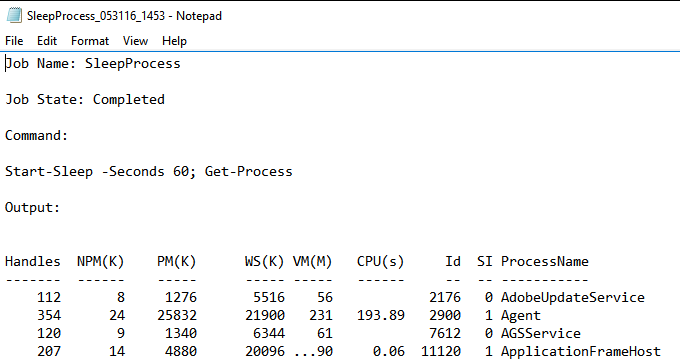
And there you have it! You can do whatever you'd like with the job information in the Switch statement.
- Jobs are capable of being run in different ways, including remotely. There are also a handful of WMI command that can be started as jobs. To see more ways jobs can be used, check out these resources.
- Add some error handling to the script example in this post.
- Post ideas in the comments!
I hope you've enjoyed the series so far! As always, leave a comment if you have any feedback or questions!
-Ginger Ninja
Comments
No comments yet. Be the first!