PowerShell: Getting Started - Creating Custom Objects
•7 min read•Ginja


Welcome to my Getting Started with Windows PowerShell series!
In case you missed the earlier posts, you can check them out here:
We will be exploring:
Everything we work with in PowerShell is an object in one way or another. A simple string is an object with the type of [System.String], using Get-Process returns objects with the type of [System.Diagnostics.Process], and using Get-ChildItem returns objects with the type [System.IO.FileInfo].
We can see that, here.

Custom objects are objects we create to collect data we want to collect. They can be comprised of objects from other datasets, arrays, and commands. Anything we can do in PowerShell can be fed into a custom object.
While we can create any type of object, from COM objects to objects based on .NET classes, we'll be focusing on the PSCustomObject. PSCustomObject is a .NET class [System.Management.Automation.PSCustomObject].
So that's nice... we can create custom objects, but why do it? Simple... output. In PowerShell it is best to keep your output from scripts and functions as objects you create or handle. This allows for better readability and re-use.
That way you can collect information, and iterate through it with built in commands such as Select-Object and Where-Object.
Since we can add anything to a custom object, from any other object/source in PowerShell, it can also be used as a method to organize information.
Let's take a look at a few example of creating custom objects.
Below I will be creating custom objects using various methods. It is important to understand that there isn't necessarily a best way to do anything in PowerShell. At the end of the day, the best way is the way that gets the job done for you.
However, I tend to gravitate towards methods that are easy for people looking at my scripts to interpret. This applies even when I'm looking at my own scripts! If I'm tired, and looking at some of my code, the last thing I need to do is try to figure out what I was doing based on code that isn't that easy to read.
Feel free to follow along! Open up the ISE and save a file to C:\PowerShell named part12.ps1. I will use the following code each time an example executes:
Be sure to include the code above with any example you want to try in the ISE.
With this method the first thing we'll do is create the object with the New-Object command, and store the object in a variable. Then we'll pipe the object to the Add-Member command. Add-Member will add the properties or methods we specify to the object we create.
We'll be using the MemberType of NoteProperty, and then give names to the properties (the names are whatever we want them to be). It's good to make them make sense! Then, finally, we'll define the Value as whatever expression we need to. In this case we'll use the some of the variables above. If you're following along and didn't catch what we have in the variables, check the summary below.
$computerInfo contains information from Get-CimInstance Win32_ComputerSystem.
$osInfo contains information from Get-CimInstance Win32_OperatingSystem.
$diskInfo contains information from Get-CimInstance Win32_LogicalDisk.
Here's the code:
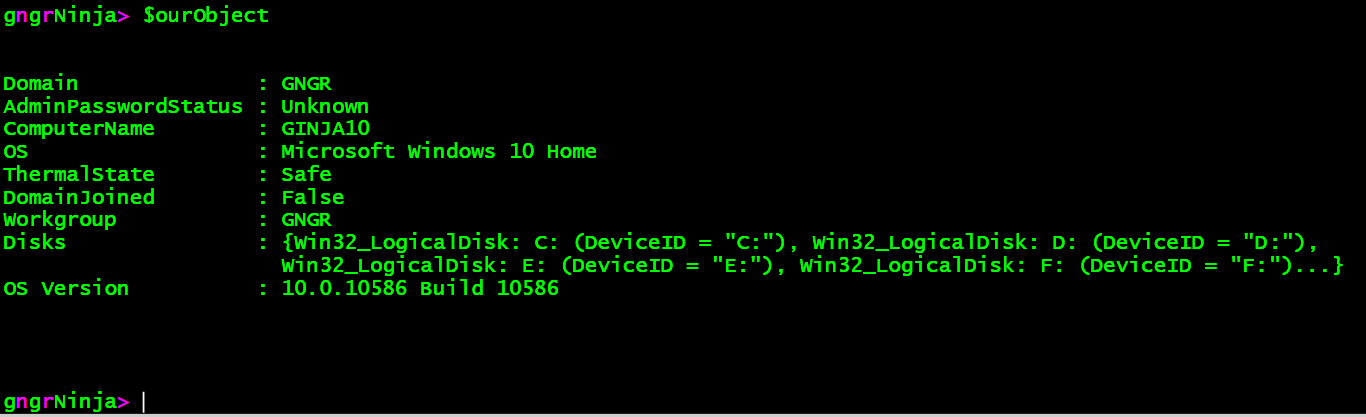
Now let's run that, and then type $ourObject to see what our object contains.

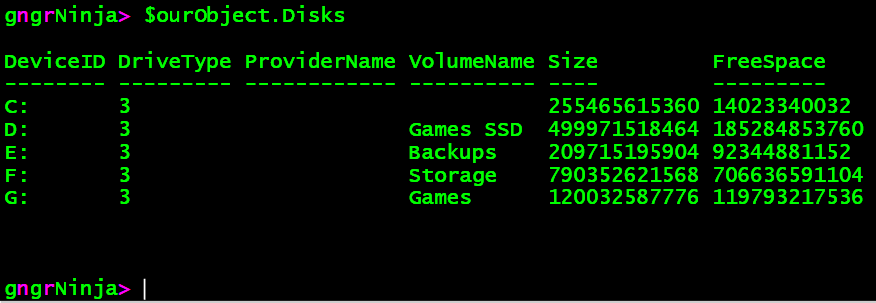
That worked! We created an object, which contains information from all three sources. We can type $ourObject.Disks to see what is contained there.
Now let's take a look at using a hashtable to add our properties and values to the custom object. A hashtable is a collection of keys that have names with associated values.
For this example I will create the hashtable, and then call its Add method to add the pairs of data (separated by a comma). With this method we will actually create the object last, as we'll be adding the hashtable of properties and values to it when we create it.
If you're following along and didn't catch what we have in the variables, check the summary below.
$computerInfo contains information from Get-CimInstance Win32_ComputerSystem.
$osInfo contains information from Get-CimInstance Win32_OperatingSystem.
$diskInfo contains information from Get-CimInstance Win32_LogicalDisk.
Here's the code:
Now let's see what $ourObject contains.
The code looks cleaner, but notice the order of the properties! It's not in the order we created the hashtable in. With Add-Member we were able to add each property, and it would keep the order we added them in.
That's not really a big deal, though! Since PowerShell has the nifty Select-Object command, we have an easy way to re-order the object.
Let's try:
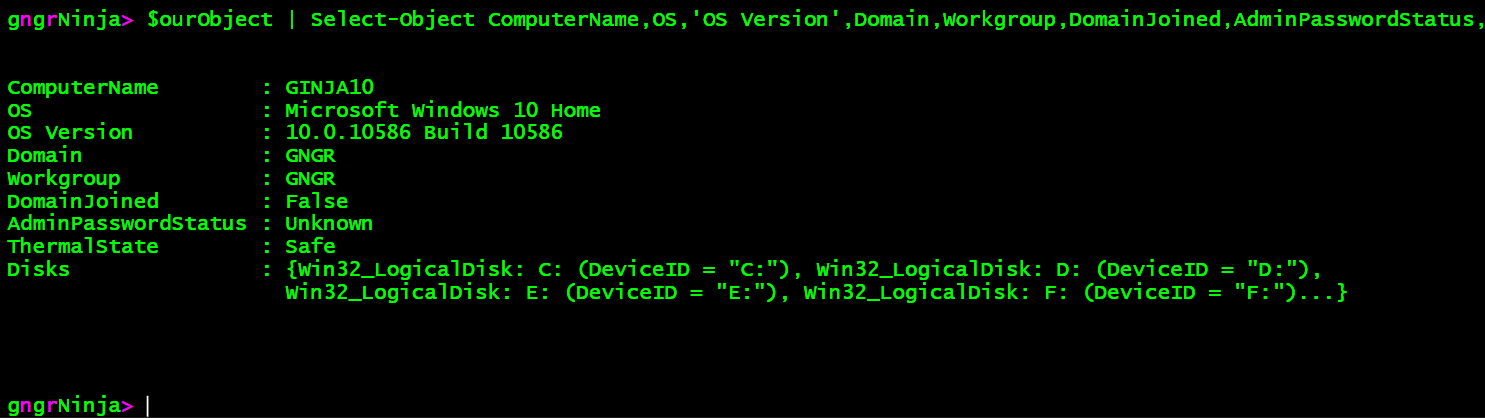
There we go, the order is as we want it now. Note that this will work to re-order any object you pass to it, and this can really come in handy.
!NOTE! Using this method is only supported in PowerShell version 3.0+
In this example I will declare the hashtable all at once, and then add the hashtable to the custom object we create. I will also use an ordered hashtable, so we can see how those work. That should allow us to keep the order of the properties correctly in the object.
Here's the code:
Let's run this [F5], and see what happens!

Looks good, and it is indeed in the right order!
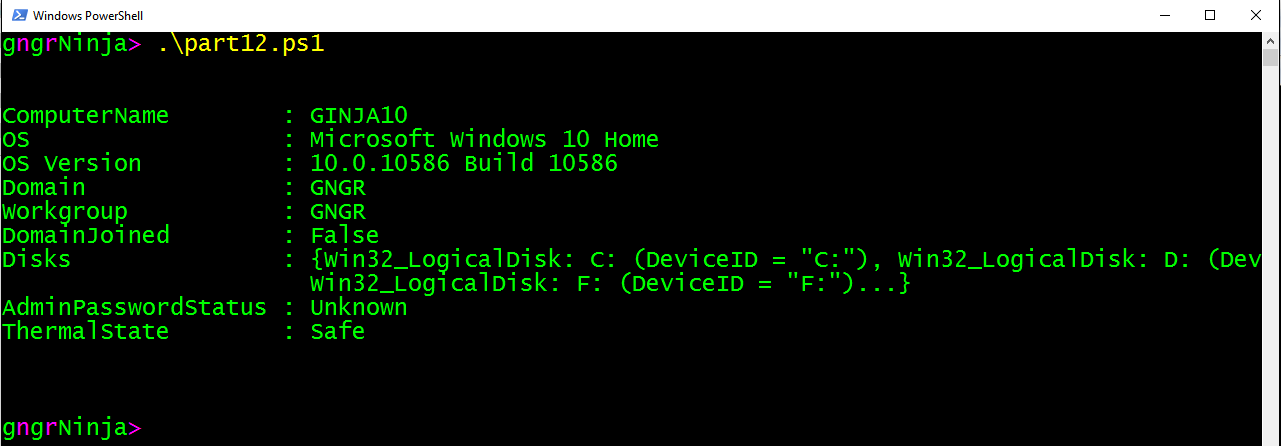
Running the script from the console shows the object in the correct order as well.
!NOTE! Using this method is only supported in PowerShell version 3.0+
We can also create custom objects using the [PSCustomObject] type adapter.
If you're following along and didn't catch what we have in the variables, check the summary below.
$computerInfo contains information from Get-CimInstance Win32_ComputerSystem.
$osInfo contains information from Get-CimInstance Win32_OperatingSystem.
$diskInfo contains information from Get-CimInstance Win32_LogicalDisk.
Here's the code:
Let's take a look at $ourObject.
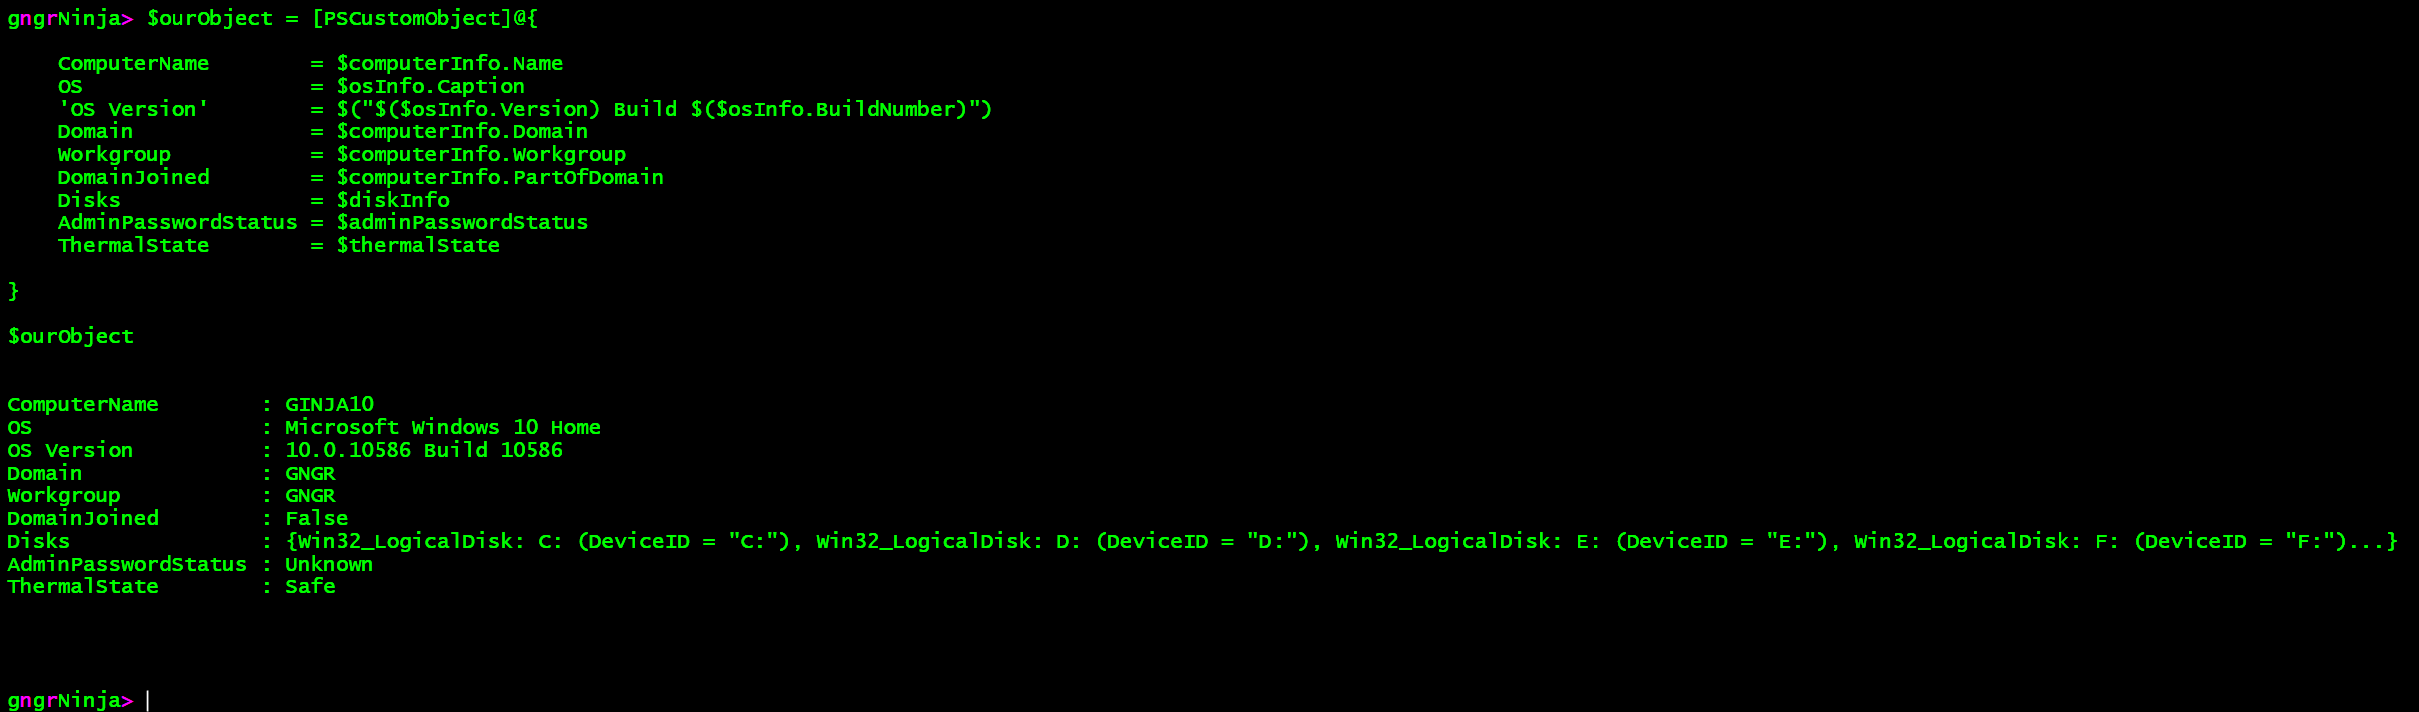
Nice! It also kept our order both in the ISE, and the console.
Here are the results from running part12.ps1 in the console:
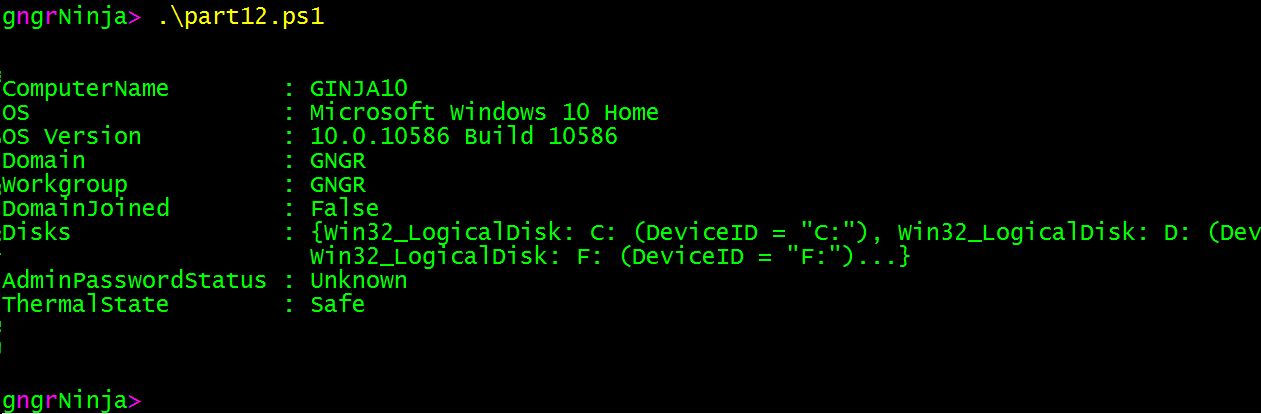
Same result. Now let's look at how we can use this code to create an array of custom objects.
Why would we want to do such a thing?
Let's look at the following scenario:
You have a list of computers that you need to get information from. You want to capture any error messages that may come up. You also would like to capture what the computer name in the file was (which we will as ComputerInput), as well as the computer name returned when querying for information. We'll also want to gather the operating system and disk information.
To do this, we can use a ForEach loop, which calls a function, and utilize Try/Catch for error handling.
We'll also use a lot of what we learned today about creating custom objects.
Setup
There is some setup to this, which is not included in the code.
$credential contains a [System.Management.Automation.PSCredential] object, which stores the credentials to access my laptop for this example.
$computers contains an array of computer names to look up. For this example, I created a text file, and used Get-Content to import it into the $computers variable.
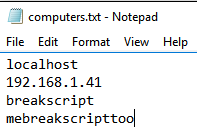
Looks like there are some potential script breakers in there!
Let's look at the code:
I've commented out the code to go over each and every step along the way.
Let's fire up the console, run the script, and take a look at the results!
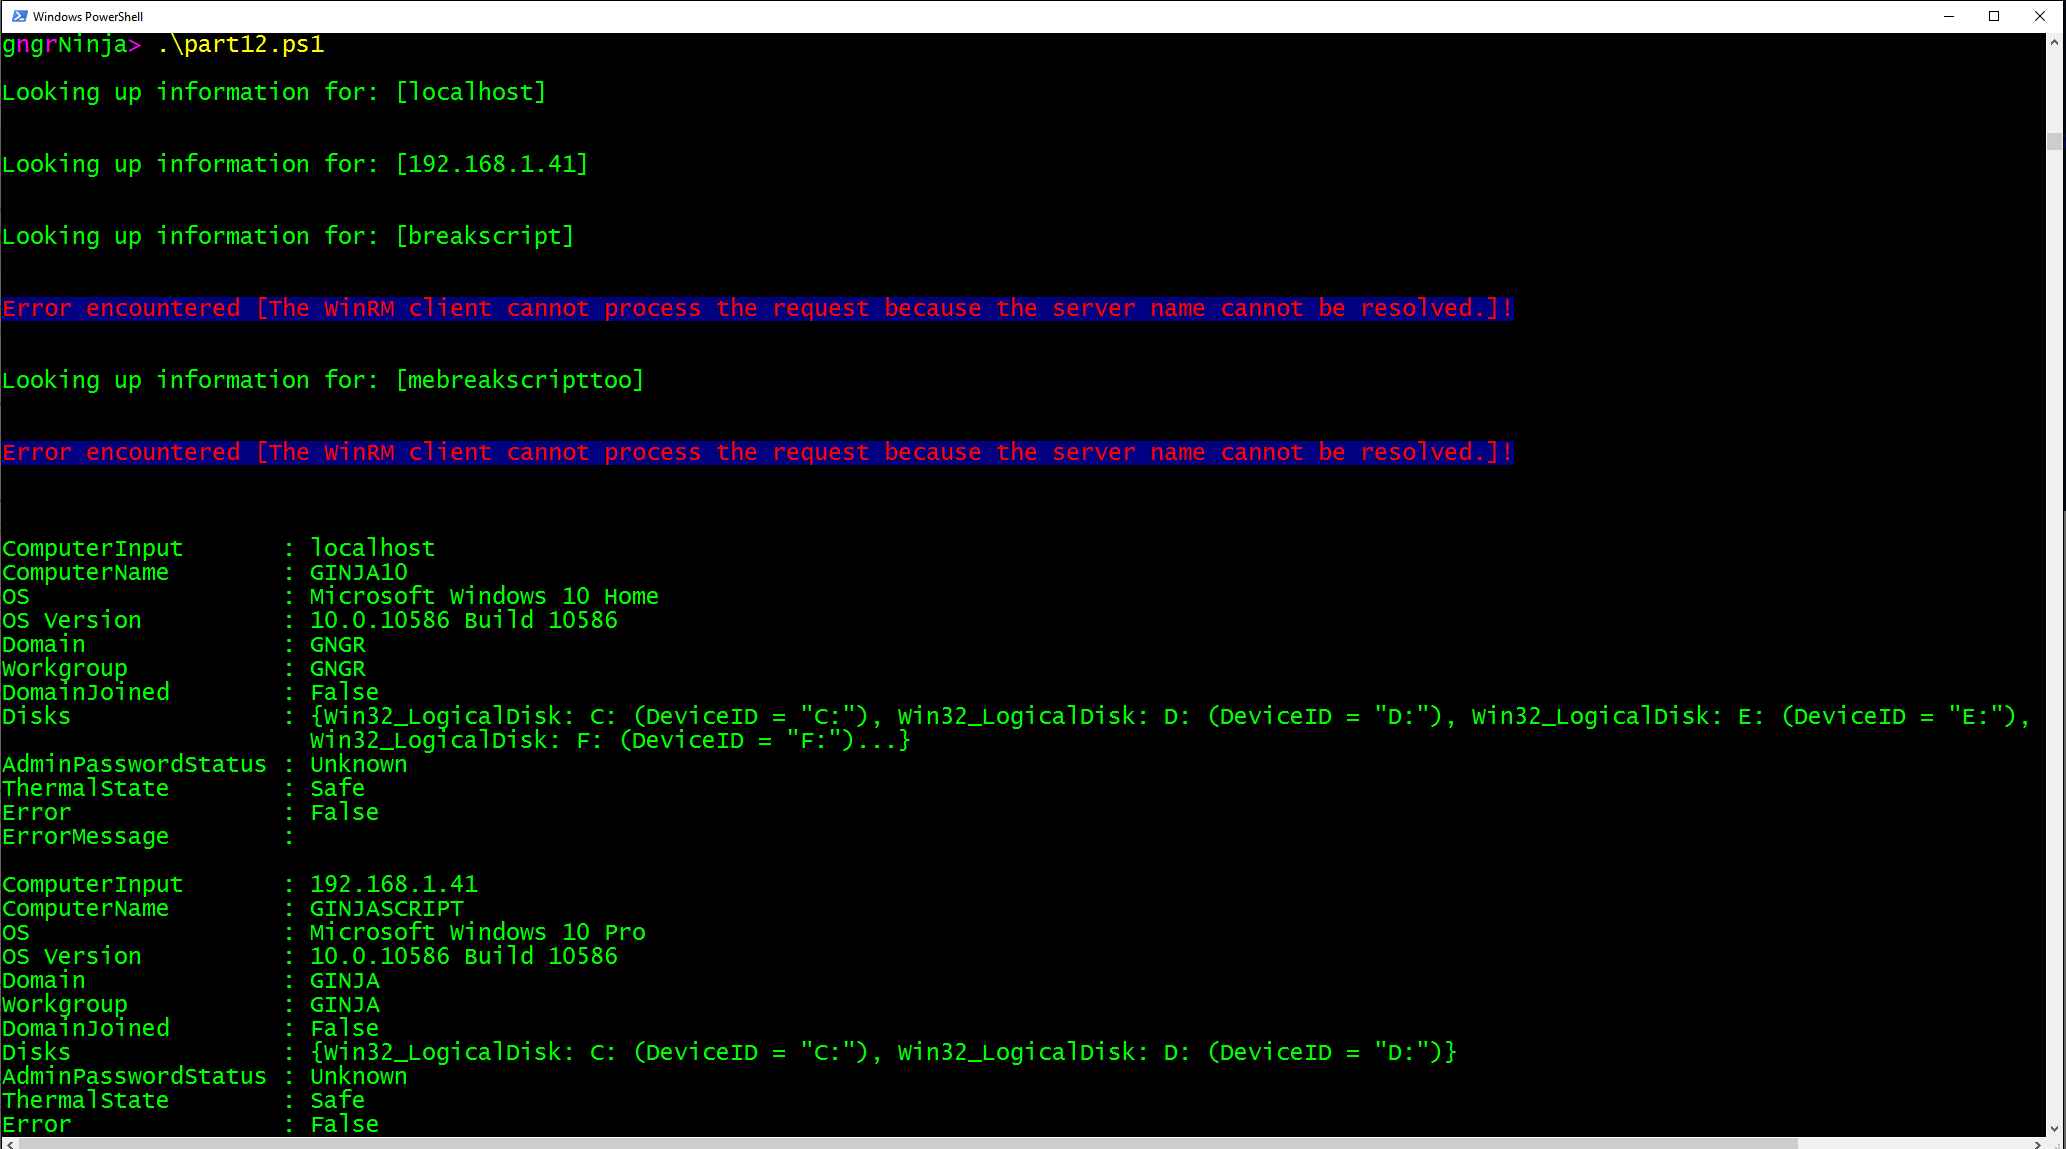
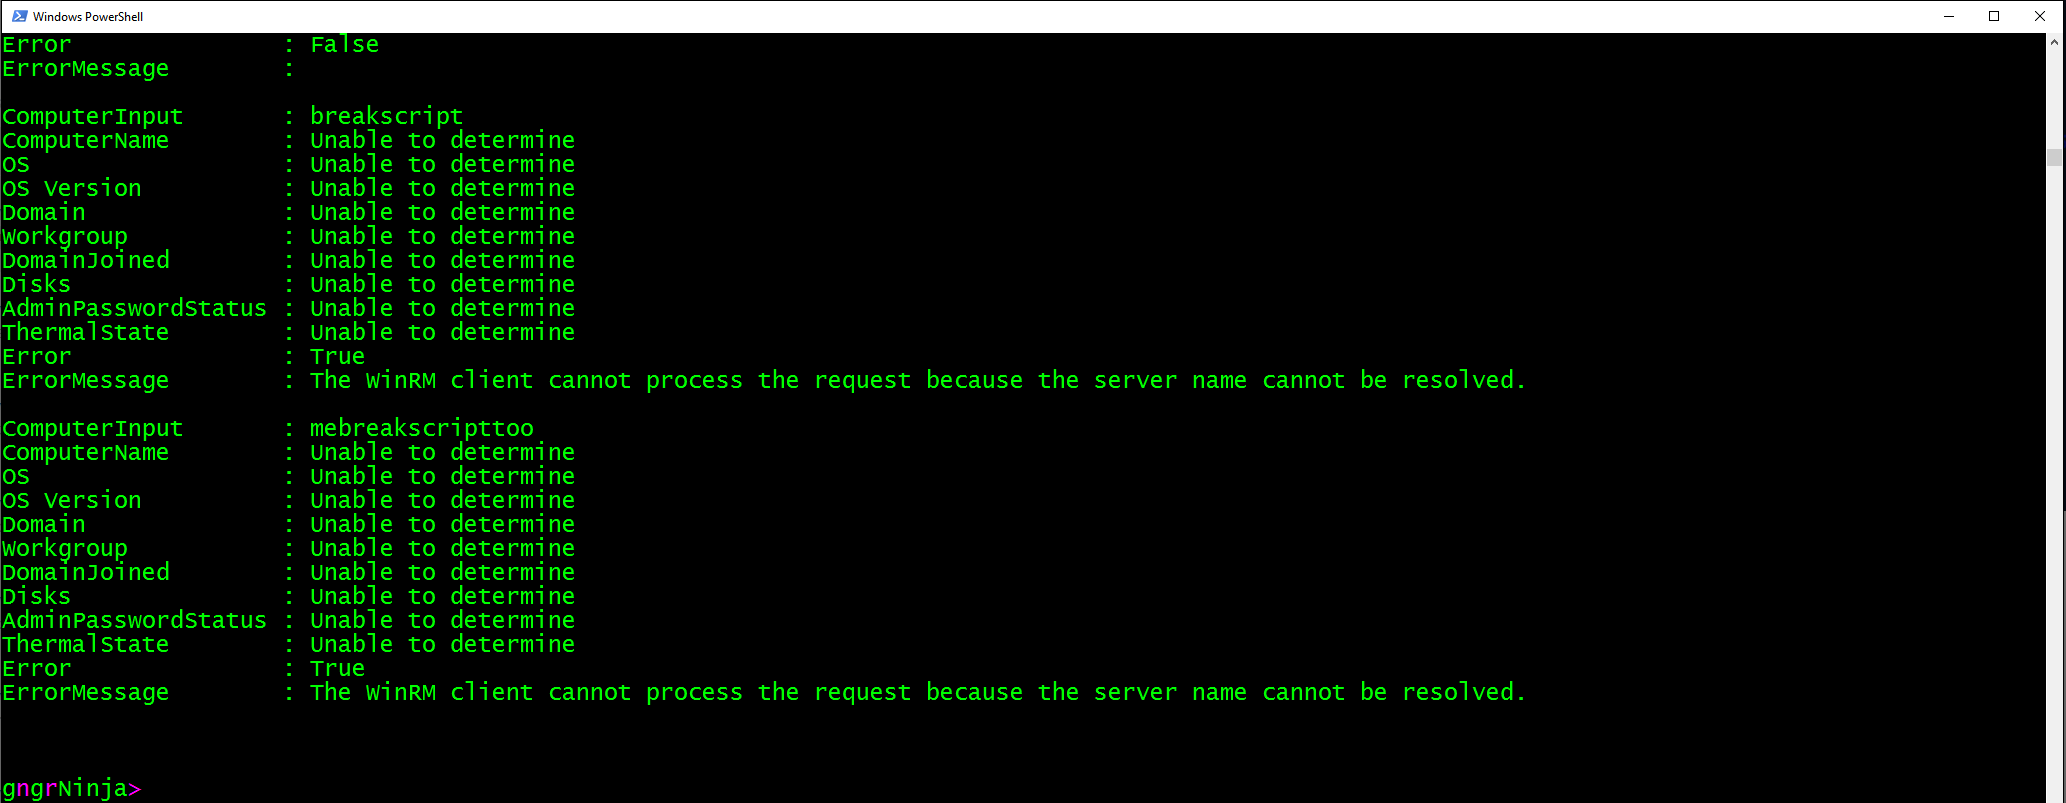
It looks like the returned object is indeed an array of objects we've created in the function.
To do this I created an array before I called the ForEach loop, and then used the Add method to call the function with the current $computerName in the loop. This returns the object as a result, when each loop iteration runs.
We can also create a variable to store the results of the script via:
$computerArray = .\part12.ps1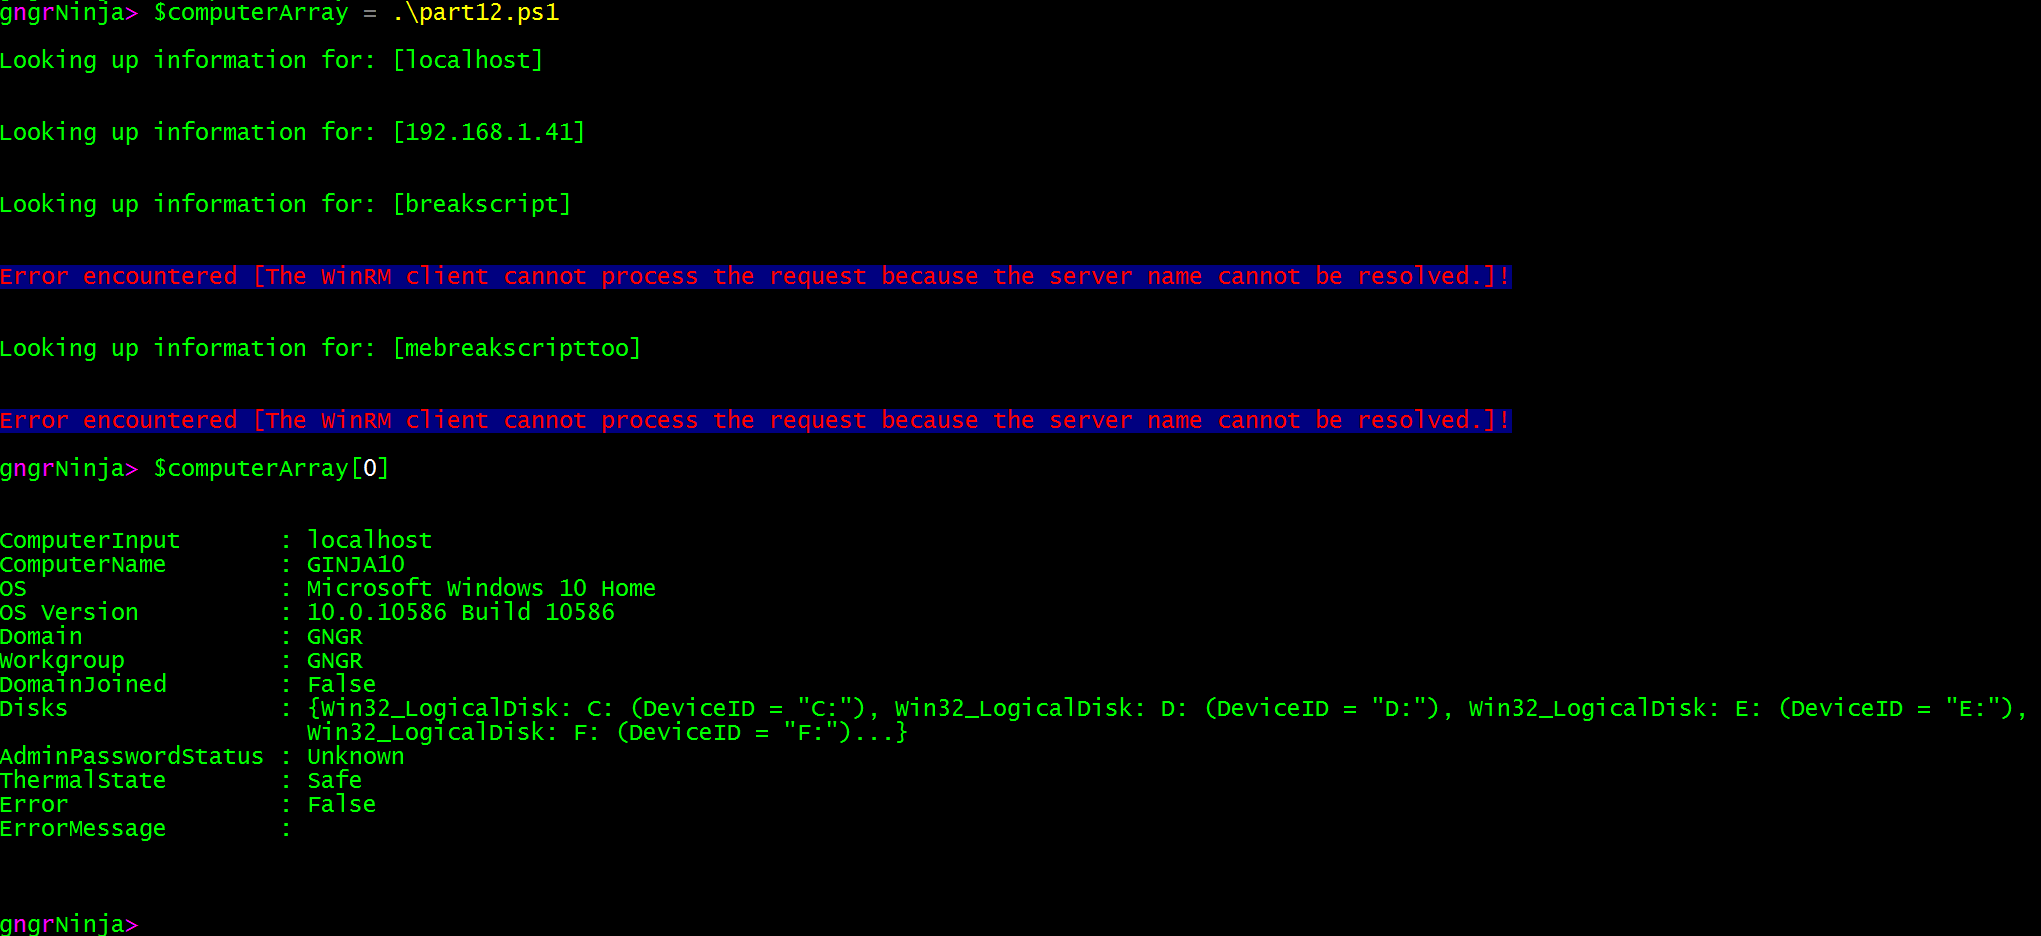
You can see that using $computerArray[0] returned the first object in the array.
Want to export this to a CSV? Use this command:
$computerArray | Export-CSV .\results.csv -noTypeInformation

Let's open the file, and see if we were successful...

Now we can format it as we see fit!

!Note! Enumerating the disks and exporting them to the CSV is a bit more tricky as it is actually an object within an object.
This is but one of many ways to use objects! Again, there is no one right way. The right way is whatever works for you and your use case!
How could you create a custom object that contains the computer name, along with network adapter, and IP information?
What interesting ways could you combine error handling with custom objects?
How can we properly export the disk information as well (from the custom object array example)?
I hope you've enjoyed the series so far! As always, leave a comment if you have any feedback or questions!
-Ginger Ninja
Comments
No comments yet. Be the first!